Showing posts with label scraps. Show all posts

Sunday, 5 February 2012

Patchworked Hangers / Cintres en patchwork


Last time I came here, I was working on some tiny patchworked pieces.  Here is what they became:  patchworked hangers.   They are a variation of those I made last year.  These were a great way to use up my smallest scraps, and I do like the colorful result.

Lors de ma dernière visite ici, je travaillais sur des tout petits patchworks.  Voici ce qu'ils sont devenus:  des housses de cintres.  Ces dernières sont semblables à celles que j'avais faites l'an dernier.  C'est un petit projet parfait pour utiliser mes plus petits retailles de tissu, et j'aime bien le résultat tout en couleurs.


I only did the patchwork on one side, and used my new Dumb Dots for the back.  Coordinated rick-rack all around and some satin ribbon completes the look.

Je n'ai fait qu'un seul côté en patchwork, et j'ai utilisé mon nouveau tissu "Dumb Dots" pour l'endos.  Un ric-rac coordonné tout autour et un bout de ruban de satin complètent la décoration.


Next up, I will be working on a special project for my turtles.  I don't show them much on my blog because I know that most people don't like turtles as much as cats and dogs, but you'll see that they can be pretty adorable.  Just wait to see what I have in store for their makeover!

Mon prochain projet en est un spécial qui met mes tortues en vedettes.  Je ne les montre pas souvent sur mon blog parce que je sais que la plupart des gens préfèrent les chats et les chiens aux tortues, mais vous verrez qu'elles peuvent être tout aussi adorables.  Attendez de voir ce que j'ai en tête pour leur transformation beauté!

Tuesday, 24 January 2012

Open and Press / Ouvrir et presser

Don’t you just love it when you find a new tool that simplifies your life?  That is what happened with the little Clover mini iron that I got for Christmas.

N’est-ce pas génial quand on découvre un nouvel outil pour nous simplifier la vie?  C’est ce qui m’est arrivé avec le fer à repasser miniature Clover que j’ai reçu pour Noël.


I tried it last week and it was a revelation.  I had some very small scraps of fabrics to piece together and needed to open all my seams as I went.  Because my scraps are very small and because I wanted to make the best of them, I reduced my seams to less than ¼” on most pieces, and I usually find it very difficult to press them open with my regular iron.  The mini iron worked like a charm and saved my fingers from the usual burns.

Je l’ai essayé la semaine dernière et j’ai eu une révélation.  J’avais de tous petits morceaux de tissu à assembler et il me fallait ouvrir chaque couture à mesure que j’avançais.  Parce que mes morceaux de tissus étaient très petits et parce que je voulais pouvoir conserver la plus grande partie des motifs, j’ai réduit mes coutures en deçà du quart de pouce habituel.  J’ai souvent du mal à presser d’aussi étroites coutures avec mon fer à repasser régulier.  Le fer miniature s’est avéré être l’outil idéal pour le faire et il m’a évité les brûlures aux doigts que je m’inflige trop souvent.


I had some doubts about the temperature that it could reach, and whether it would be enough to easily press seams, but I was impressed.  There are two different settings for the temperature.  I only tried the one for cotton, the other one is for more delicate fabrics.

J’avais au préalable quelques doutes sur le degré de température que ce petit fer pouvait atteindre.  Je craignais que la température ne soit pas assez élevée pour aisément aplatir les coutures, et j’avoue que j’ai été impressionnée.  Il y a deux réglages de température sur ce fer.  J’ai essayé seulement la plus élevée qui convient au coton, l’autre servant aux tissus plus délicats.


So, if you do lots of patchworks with small pieces, I am certain that this mini iron would be a great addition to your quilting toolbox.

En bref, si vous êtes de celles qui s’adonnent régulièrement à l’assemblage de petits morceaux, je suis convaincue qu’un fer miniature serait un atout dans votre trousse d’accessoires.

As to what these mini patchworks are destined to, you will have to wait a few days before I show you the final result.  Any guesses?

Et pour ce qui est de ces mini patchworks, vous devrez attendre quelques jours avant de voir leur usage final.  Vous voulez deviner?


Sunday, 19 December 2010

Fabric Basket Tutorial

Here is - finally! - a tutorial for my little FQ fabric basket.  The incredible response I've had to my giveaway has given me the small push I needed to sit down and write it.  So here it is, hopefully clear enough to be understood, but if anything is missing, please let me know and I will try to clarify.

FQ FABRIC BASKET TUTORIAL


Material needed:
Coordinated fabric scraps (fat eights work well for the sides)
Thin polyester batting (cotton and bamboo are not stiff enough)
Non-woven, heavy weight sew-on interfacing
Two yards of ribbon
Matching or contrasting thread
Vanishing-ink fabric marker
Plastic Ruler
Hand-sewing needle
Scissors
Rotary cutter (optional)
Cutting mat (optional)
Sewing machine (optional)

Cutting List:

From the outside fabric (here the black and green fabric)
2 pieces of 13" X 4" for long sides
2 pieces of 51/2" X 4" for short ends

From the inside fabric (here the green dots)
2 pieces of 13" X 4" for long sides
2 pieces of 51/2" X 4" for short ends

From the bottom fabric (here the floral)
2 pieces of 13" X 51/2"

From the batting:
2 pieces of 13" X 4"
2 pieces of 51/2" X 4"
1 piece of 13" X 51/2"

From the interfacing:
2 pieces of 13" X 4"
2 pieces of 51/2" X 4"
1 piece of 13" X 51/2"

From the ribbon:
8 pieces of 7" long


Once you have chosen your fabrics, iron each piece and cut according to cutting list above.  I have used two coordinated fat eights for the sides, but any scraps will do.  It would even be fun to have all different sides.

What you choose to use as batting and interfacing will determine the sturdiness of your basket.  I wanted a clean look, but I don't plan on moving this basket around much, sot extra sturdiness was not necessary.  I have tried different combinations and this light batting with the thick interfacing is what gave me the most satisfying result.  However, if you need something sturdier, inserting plastic canvas might be a better option.  In that case, you would need to leave larger openings when you sew around each side.

Step-by-step how-to


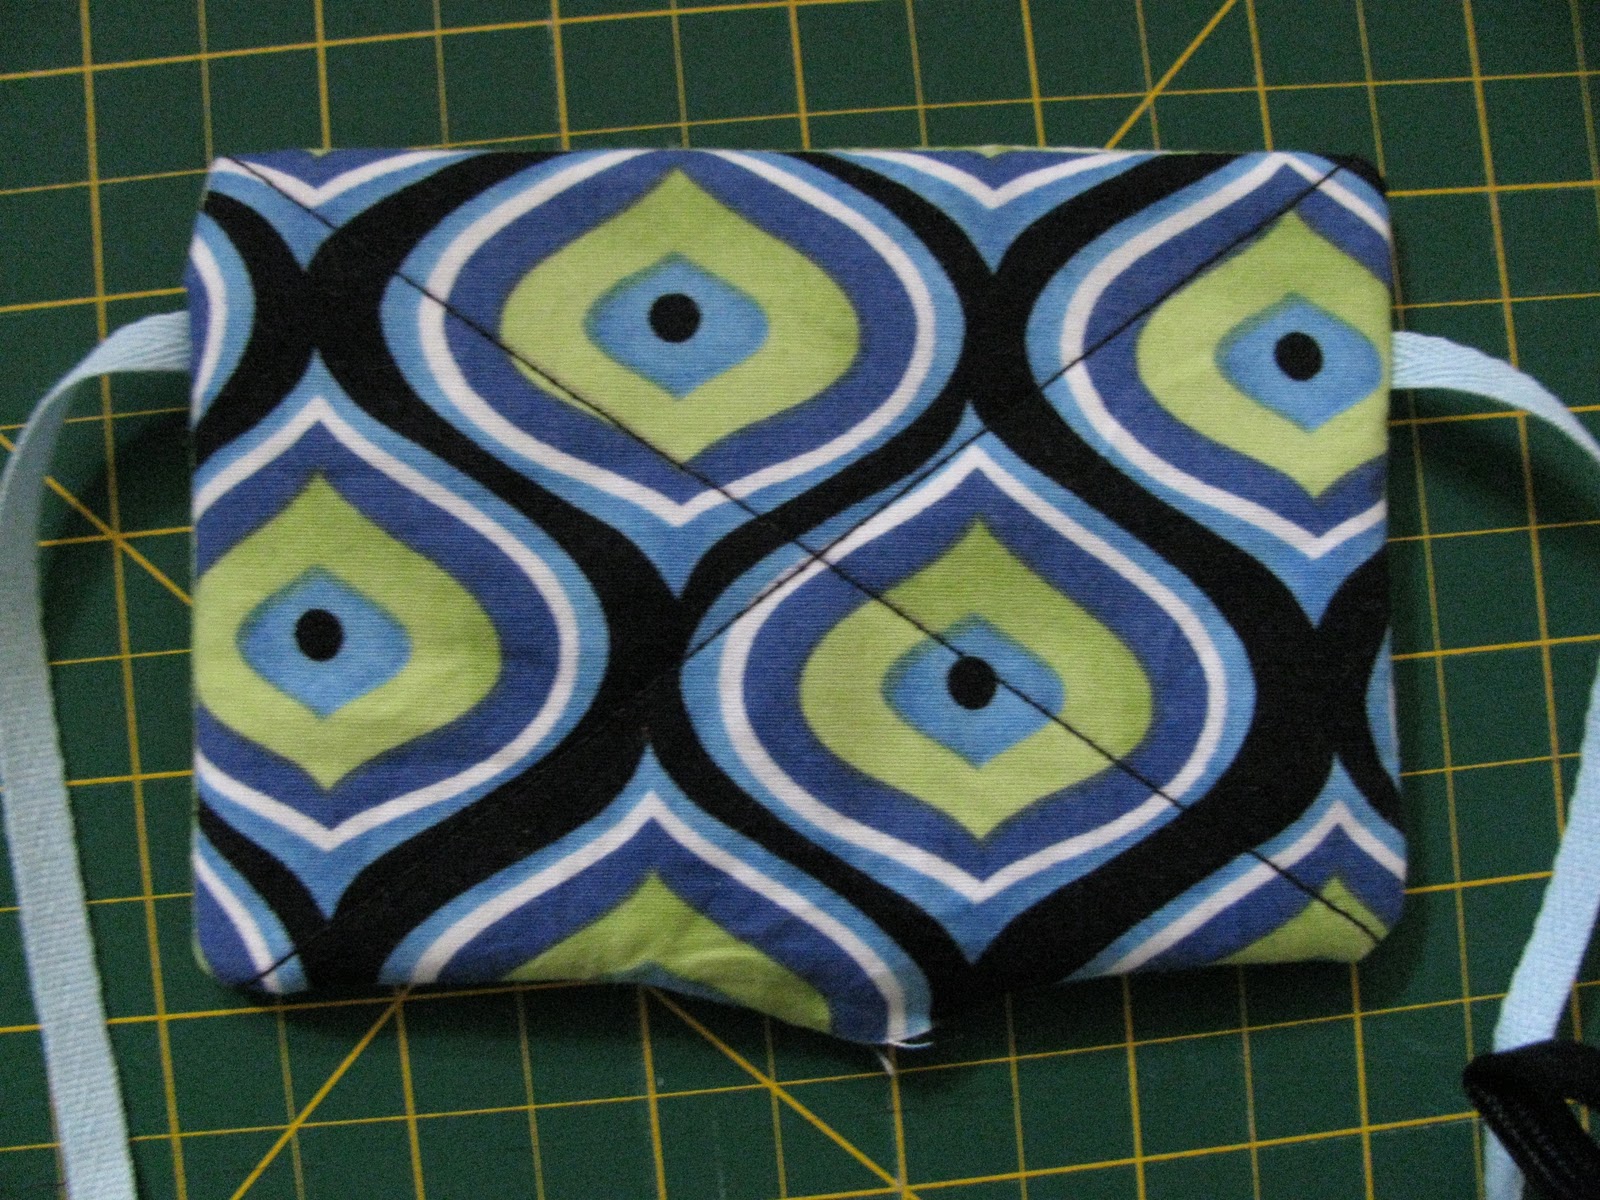
1.  As we have four layers for each four sides of the basket (inside fabric, batting, interfacing and outside fabric), we will quilt three of them together to give stability and add a little interest.  The quilting may be done differently than what I do, a simple cross pattern, but from experience I would recommend to avoid vertical or horizontal lines as they make a bend in the side of the basket and make it lose its shape.  So, this being said, take a small piece of the outside fabric, and using a ruler and a fabric marker, trace an X from corner to corner.  Repeat for the other small piece of outside fabric.  For the two long pieces of outside fabric, trace two Xs, from corner to middle of long side.


2.  Now what you need to do is a “sandwich” with one piece of batting, one piece of interfacing, and one piece of outside fabric on top, right side facing up.


3.  Quilt the three layers on the X that you have marked, either by machine or by hand.  Repeat for the three other sides.

4.  Now is time to add the inside fabric and the ribbons to the “sandwich”.  Place a quilted piece of outside fabric on your work table, outside fabric facing up.  Position two pieces of ribbon, one on either side, at 1” from the top.

5.  Then, lay the inside fabric over, wrong side facing up, and pin everything in place, making sure that the loose ends of ribbons will not get caught in the seam.


6.  Sew around the “sandwich”, leaving a 2” opening on the bottom side, i.e. the long side farther from the ribbons.  Clip corners.


7.  Turn right side out and repeat for all three other sides, and for the bottom part, omitting the ribbons on this last one.


8.  Iron flat all pieces and hand sew the openings.

9.  Now is time to assemble the sides to the bottom of the basket.  Place the bottom on your work table, inside up ( I chose the quilted side to be inside the basket, but you could choose otherwise, it won’t make much of a difference).  Take one side of your basket and lay it on the bottom piece, outside up, aligning the bottom sides of both pieces.  Pin in place.  Hand sew both pieces together.


10.  Repeat for other three sides.

11.  Tie the ribbons in the corners and you have a finished basket!

Sunday, 16 May 2010

May Giveaway Day

It is time for Sew, Mama, Sew's big Giveaway Day, and I have a little something to offer to two of you.

First winner will get a scrap pack of some fabrics I have used in the past few months on various projects.

Second winner will receive 18 3X3" squares of Proud by Keri Beyer, two of each designs shown below, along with a half yard of Timeless Treasure, pictured in the background.

If you want a chance to win, please leave a comment on this post, telling me what is your favorite projects using scraps of fabrics.

This giveaway will be opened until midnight, EDT, on May 20, 2010. Everyone can enter, I will ship to international addresses.

Please make sure to leave a way to contact you, either an email address or a link to your blog. If I don't have any way to reach you, I will have to draw another name, sorry.

Winner will be randomly selected and I will post the result sometime on May 21, 2010.

Thanks for visiting and best of luck to everyone!

Sylvie