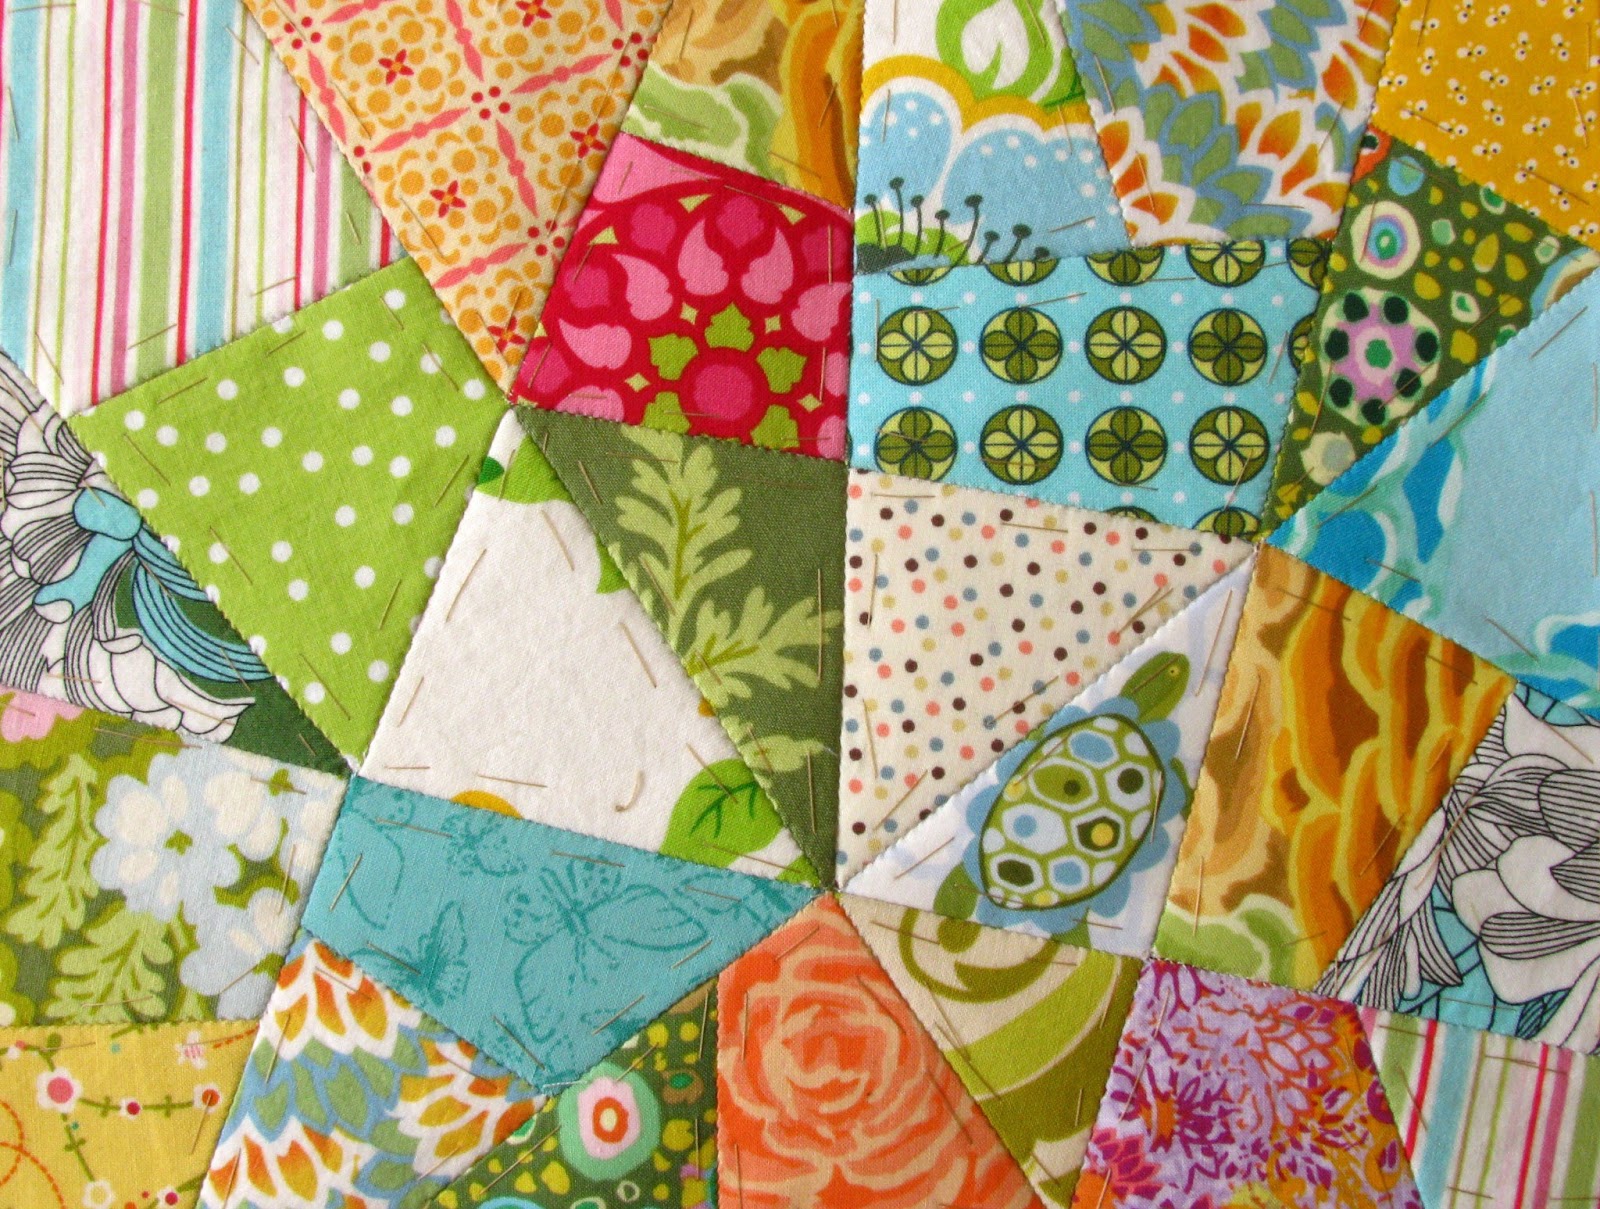
Lately I have been thinking a lot about trying crazy quilting on a small scale. I like the look of all the different shapes and fabrics mixed together. I was also missing paper-piecing, which I usually did with hexagons. So I thought it might be fun to mix both and make a crazy paper-pieced quilt. I will show you how I made it so you can try it too if you'd like. You will see that it is very easy once you have figured out what works best, and that part I already did it for you!
Je suis très attirée par les pointes folles ces temps-ci, et j'avais bien envie d'essayer d'en faire, à petite échelle. Je m'ennuyais aussi du "paper-piecing", que j'avais l'habitude de faire avec des hexagones. Alors, j'ai pensé que je pourrais joindre le look des pointes folles à la technique du "paper-piecing" pour voir un peu ce que ça donnerait. Je vais vous montrer ici comment j'ai procédé et vous pourrez en faire de même si le coeur vous en dit. Vous verrez que c'est très facile une fois qu'on a compris ce qui fonctionne le mieux et ce qu'il faut éviter, et j'ai déjà fait les tests pour vous!

As I wanted to try a small-scale project, I used a regular letter-size sheet of paper, but you can choose any size or shape that you like. I would recommend however to keep straight lines because you will find that curves are quite a challenge in paper-piecing. I started by tracing two lines horizontally, but with different directions so that it doesn't end up looking too much like a grid.
Comme je voulais essayer un petit projet, j'ai utilisé une feuille de papier de format lettre régulier, mais bien sûr vous pouvez utiliser n'importe quelle forme et grandeur que vous choisirez. Je vous recommande par contre de garder des lignes droites parce que les courbes sont plutôt difficiles à réaliser en "paper-piecing". J'ai commencé par tracer deux lignes horizontales, mais en variant leurs directions, pour éviter l'effet grille régulière qui n'a pas sa place en pointes folles.

I then traces two more lines, this time vertically, and once again I used different directions. The reason why I started with making sections like these is to make it easier when the time comes to assemble the pieces. I ususally assemble all three vertical sections individually, and then join them together to complete the pattern.
J'ai ensuite tracé deux autres lignes, cette fois à la verticale, toujours en variant les directions. La raison pour laquelle je commence par créer des sections est pour me rendre la tâche plus facile lorsque le moment sera venu d'assembler mes morceaux. Je procède en assemblant d'abord les morceaux des trois sections verticales, et ensuite je joins ces trois sections pour compléter le motif final.

Once I have my initial sections, I trace more lines within each of them to create what will be each piece of the quilt. One thing I have learned from my own mistake is that it is better to avoid too many points to meet in the same spot. You can see what I mean in the picture below, where I have 6 points meeting in one spot, and 7 in another. This may look all right, but it was not easy to assemble, and it also creates bunched up fabrics on the back that can be a problem when you use the patchwork to make it into something like a place mat or a bag. The second thing that I learned is that triangles are difficult shapes to work with, so although you can include some triangles in your pattern, try keeping a majority of shapes with four or five sides.
Une fois que j'ai tracé mes sections initiales, j'ajoute des lignes dans chacune d'entre elles pour déterminer la forme et la taille de chacune des pièces du quilt. Une des choses que j'ai apprise de mes erreurs est qu'il vaut mieux éviter d'avoir trop de pointes qui se rencontrent en un même point. Comme vous pouvez le voir sur la photo qui suit, il y a 6 pointes qui se rencontrent en un même point, et 7 en un autre. Le look est très bien, mais l'assemblage était plutôt difficile, sans compter que toutes ces pointes créent un amas de tissus sur l'endos, qui peut devenir un problème au moment ou on voudra utiliser le patchwork pour en faire un napperon ou un sac. La deuxième chose que j'ai apprise est que les triangles sont des formes difficiles à travailler, et bien qu'on puisse en intégrer quelques-uns dans le patron, il est plus facile d'avoir une majorité de pièces à quatre ou cinq côtés.


When I have traced all the pieces in each section, I take a moment to review them and make a few changes so that the general look is to my liking. Then, I number every piece. This will be very helpful in the future steps. Here, I have erased a line in section 28, which was originally separated in two pieces, but then I thought it looked like too many small shapes aligned with numbers 25 and 26.
Quand j'ai tracé les lignes qui vont délimiter chacune des pièces dans chaque section, je prends un moment pour revoir le tout et faire quelques changements jusqu'à ce que l'allure générale soit à mon goût. Ensuite, je numérote chaque pièce, ce sera très utile dans les étapes suivantes. Ici, vous pouvez voir que j'ai effacé une ligne dans la section 28, qui était au départ séparée en deux, mais je trouvais qu'il y avait trop de petits morceaux alignés, avec les numéros 25 et 26.

The next step is to make a copy of your pattern. A photocopier is very helpful here, and if your copier is like mine, it helps to set it to darker copy, so that all the lines show on the copy.
La prochaine étape est de faire une copie de votre patron. Un photocopieur est très utile à ce point-ci, et si le votre est comme le mien, il est préférable de choisir l'option d'une copie plus foncée, pour s'assurer que toutes les lignes apparaissent sur la copie.

Next, turn your copy over and write the same numbers on the back of every piece as the one shown on the front. Here, I recommend using a colored pen or pencil, so that you will easily know which side is the front and which is the back. It may sound stupid at this point, but once the pieces are all cut and loose, you will be happy to have this mark.
Ensuite, tourner la copie que vous venez de faire et inscrivez à nouveau les mêmes numéros dans chaque pièce. Ici, il est intéressant d'utiliser un crayon de couleur, qui vous permettra d'identifier facilement quel côté est l'endroit, et quel côté est l'endos. Ça peut paraître assez simpliste à ce moment, mais une fois toutes les pièces découpées, vous serez contente d'avoir pris le temps de faire cette distinction.

Now, time to cut out the pieces of the copy, the one with the numbers on the back. Keep the original, you will need it to help you find out how to reassemble all these pieces. Trust me, you will need it.
Il est maintenant temps de découper tous les morceaux de la copie, celle avec les numéros à l'endos. Conservez votre original, vous en aurez besoin pour vous aider à réassembler toutes ces pièces. Croyez-moi, vous en aurez besoin!


Here is all the material you will need to start working on your paper-pieced crazy quilt:
- Your original pattern
- All the cut-out, numbered pieces
- Flat head pins
- Regular scissors to cut your fabrics to size
- Fine point scissors to cut your threads
- Threads and needle. Here you can see that I use two different threads: cheap dollar store thread to baste my fabrics to my paper pieces, because it only needs to hold it for so long, and there is no need wasting good thread for that purpose. Then, I use solid thread specially made for hand sewing when I start assembling the pieces together.
- Fabric scraps. You may want to pre-select your fabrics to make sure that all you have on the table is coordinating, so that you can go quickly without pondering too much on which fabric to use for each piece. In this case, I chose fabrics with spring colors, and I eliminated everything with reds or small florals, although many of my scraps had these elements in them. This was a personal choice, but you can go whichever way you want.
Voici la liste de tout le matériel dont vous aurez besoin pour commencer à travailler sur vos pointes folles en "paper-piecing":
- Votre patron original
- Toutes les pièces découpées et numérotées
- Des épingles à têtes plates
- Des ciseaux réguliers pour couper votre tissu à la bonne dimension
- Des ciseaux aux pointes effilées pour couper vos fils
- Du fil et une aiguille. Vous remarquerez ici que j'utilise deux sortes de fil: du fil bon marché du magasin à un dollar pour faufiler les formes de papier au tissu, parce que je n'ai pas besoin que ce fil soit très résistant, puisque je vais le retirer une fois l'assemblage terminé. Par ailleurs, pour assembler les pièces entre elles, j'utilise un fil beaucoup plus résistant qui est conçu pour la couture à la main.
- Des retailles de tissus. Il est bon de faire une pré-sélection des tissus pour s'assurer de ne conserver sur la table que des tissus qui sont coordonnés, de sorte que vous pourrez avancer plus rapidement sans vous poser trop de question au moment de choisir un tissu pour chacune des pièces. Dans mon exemple, j'ai choisi des couleurs printannières, et j'ai éliminé tous mes tissus qui comportaient du rouge et des toutes petites fleurs, bien que beaucoup de mes retailles comportaient au moins un de ces deux éléments. C'est un choix personnel pour ce projet en particulier, mais vous pouvez choisir la direction qui vous plaira.
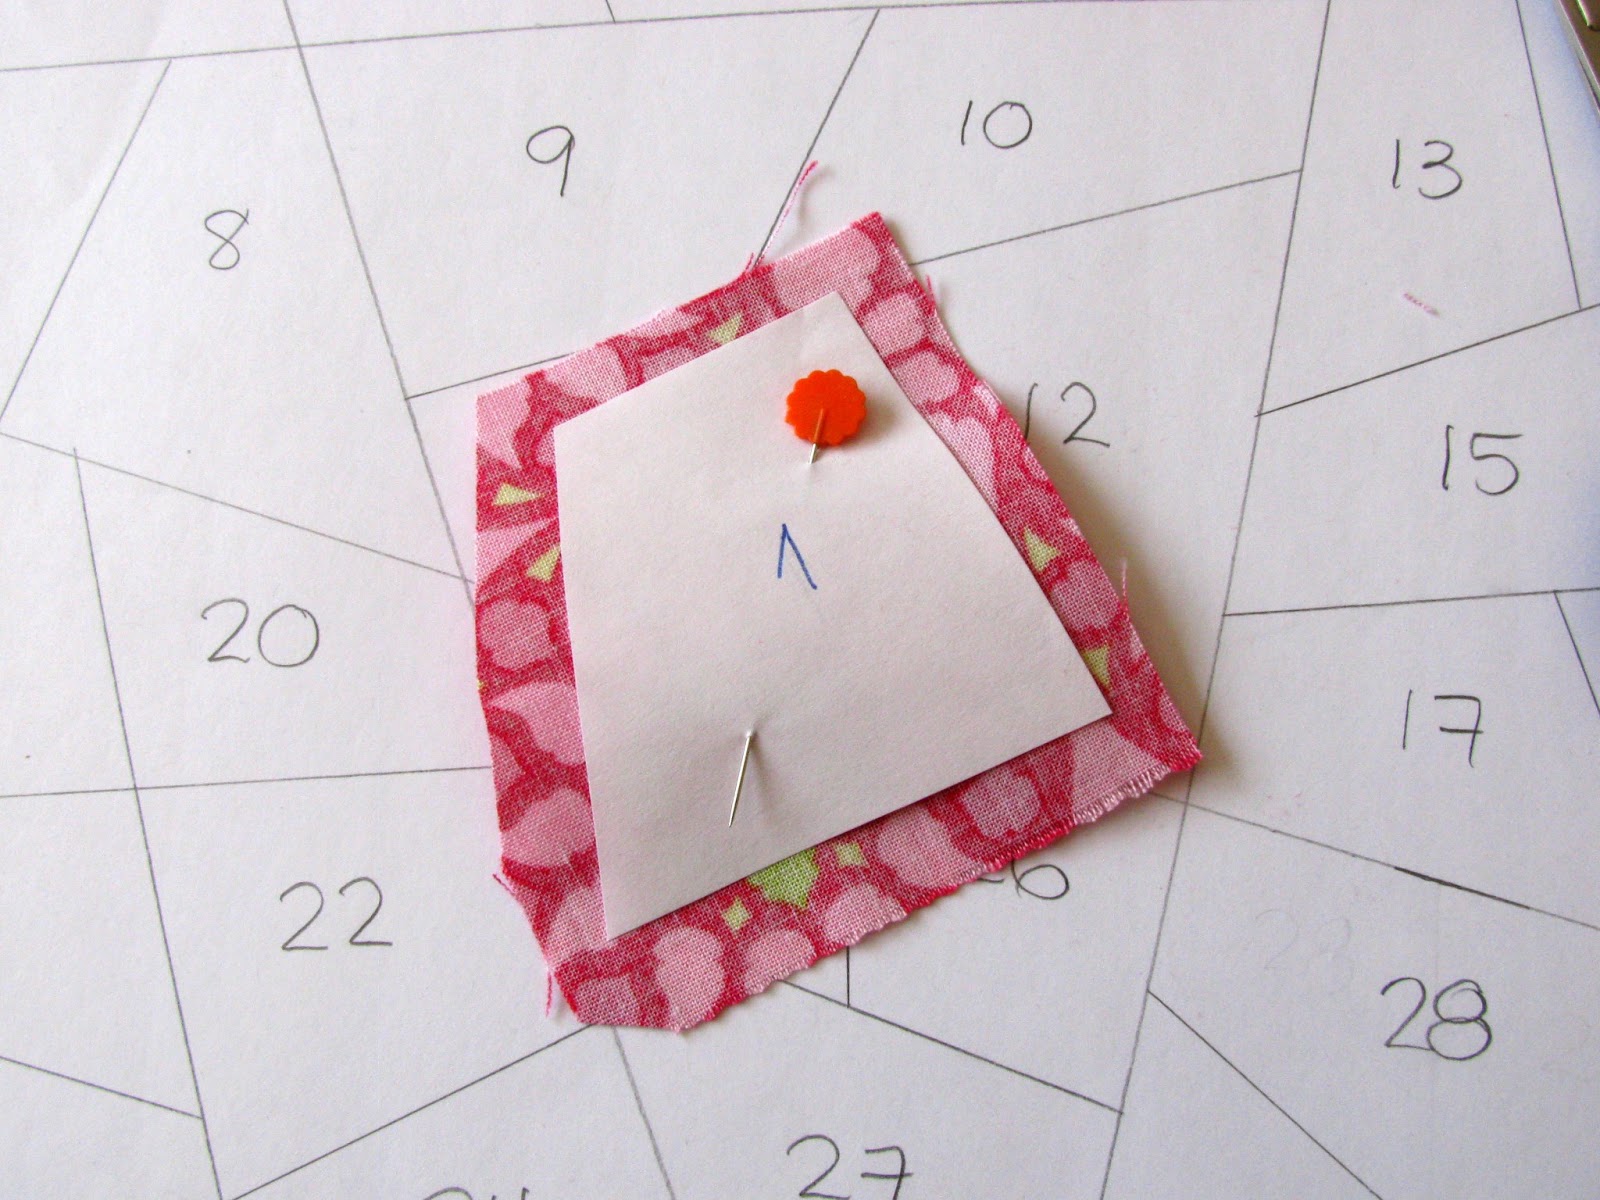
And then, the fun begins. For each piece of paper, you can choose a fabric and baste them together. The picture above shows you where your colored numbers come in handy. When placing your paper shape on the back of your fabric scrap, always make sure that the colored number (the back of the paper piece) is facing you, so that when you come to the assembling part, you don't have any bad surprise of a piece basted on the wrong side that doesn't fit in the pattern.
Et maintenant, le plaisir commence. Pour chacune de vos pièces de papier, vous pouvez choisir un morceau de tissu et les faufiler ensemble. La photo ci-dessus vous montre comment les numéros que vous avez inscrits en couleurs deviennent utile. Au moment de placer votre pièce en papier sur l'endos de votre morceau de tissu, assurez-vous toujours que le numéro en couleur (donc l'endos de votre pièce de papier) vous fait face. De cette façon, quand vous en serez à l'assemblage, vous n'aurez pas la mauvaise surprise d'un morceau de papier qui a été faufilé du mauvais côté et qui ne peut pas s'incorporer dans le patron.

As you go along, you can use your original pattern to keep track of where you are at, which fabrics you have used in adjoining pieces, and see the general look of your work as it progresses. This will also help you a great deal in assembling your pieces, because you know exactly where is the place for each one of them.
À mesure que vous avancez dans votre ouvrage, vous pouvez utiliser votre patron original pour voir ou vous en êtes, pour vérifier quels tissus vous avez utilisé pour les morceaux voisins et pour garder un oeil sur l'allure générale de votre projet. Cette façon de procéder vous aidera aussi grandement au moment de l'assemblage, puisque chaque pièce est déjà à sa place sur le patron.

Hope you have as much fun with this as I do! I am on my third piece and can't seem to stop going!
J'espère que vous aurez autant de plaisir que moi avec vos pointes folles en papier! J'en suis à mon troisième patron et je ne peux plus m'arrêter!